Subsections of Equipment
Thoughts for HF/VHF Truck/SUV mobile operation
Tuner
The LDG RT-11 from LDG Electronics seems to be the best value.
Mounts
For mounting a whip antenna, split ball mount behind the drivers side of the cab, on the cab. Watch the height of this location. In the US, max legal height is 13ft 6in for most places.
My experience with springs is that they are more trouble than they are worth. (I’ve tried lots of ’em.)
Definitely go with a quick disconnect for the antenna mount. Not all QD’s are created equal. I like the one’s I’ve been buying from wb0w.
Also, not all split balls are created equal. You will want something like one of the Hustler heavy duty models. You can get ’em with either UHF or terminal connections on the back side of the ball. Another nice feature of these is that the plastic insulator has a crown of sorts on it, that helps to keep the mount from rotating.
An alternate mounting location and much stronger, would be to get a sheet of metal, cut it off into a triangle and mount it near the corner of the bed. This mounting location would be sturdy enough to support the biggest of antennas.
In any mounting location, make sure you have a good ground. I use a dremel tool with grinding bit to get to bare metal.
Antennas
Screw driver will work great and be expensive, but you won’t need the tuner.
You could use a CB whip as an ultimate compromise vertical.
If you get a set of “hamstick” type antennas with QD connectors you can use each one +/- 1 band. Use 15M on 17M and 12M w/tuner.
Or you could home brew a vertical solution for ~$35. My HB antenna lets me do 2/6M or any band 10M-30M while mobile. I can do 80M stationary with the addition of a ~40’ wire. I am working on a solution for 40M mobile.
Btw, I hope you had the RF filter installed in the fuel pump.
If you couldn’t tell, I love mobiling.
Also, if you give it some advance thought you could configure
things so that you could easily transition it all to a back pack
with battery, counterpoise wires, spare coax, etc.
Here is where the LDG Z11 and whips with QD connectors have an advantage.
73 DE Bryan, k0emt
Tips for new FT-818 owner
I am a huge fan of the Yaesu FT-817/818 radios. My first brand new HF rig ever was a FT-817 not too long after their initial release. I took it on many portable, SOTA, and POTA adventures. It had both the W4RT CW filter installed and the compressor kit in the microphone. That is the only rig I’ve ever regretted trading off.
Now I have a couple of FT-818s with different configurations. One more fancy, bells and whistles, the other more budget oriented. Both tons of fun!
2021 update
Yahoo groups are a thing of the past. Look for a groups.io group or a FaceBook group.
Also, we’ve gone from the 817, to the 817ND, and now the 818.
Filters
W4RT has long since gone out of business and their filters and compressors are no longer available.
Crystal filters are difficult to obtain for CW.
SOTABeams sells a digital filter that someone with advanced building/soldering skills can add into the rig. They also have an external version.
SOTABeams also sells an external speach compressor that is plugged inline with the microphone.
Finals
The 817 series has finals that are sensitive to high SWR and leaving batteries in them on the shelf. I recall reading something about how the finals stage was still getting power to it even when turned off (soft switch).
Check your output. Odds are that you will at some point in time join the blown finals club. Luckily, the 818 finals board works throughout the 817 series and is available from Yaesu. Fortunately, it is not an overly expensive part.
Internal Battery
NiMh
The 817 series is a power pig and won’t last very long on 1500mAh batteries. If you insist, know that not all AA NiMh are the same. Look for those with a capacity over 2400mAh. The NiMh will have a larger form factor and you’ll have difficulty getting them into the AA tray. You will also not be able to charge the NiMh AAs in the tray without doing a modification. Overall, skip on the NiMh batteries.
Lithium Ion
The best/most practical interal battery approach is to pick up an internal 3000mAh LiIon battery kit from WindCamp.
18650
Check the 3D printing sites. There are some options for getting a 3S 18650 internal battery set up.
External Battery
Print, make, or buy a Yaesu DC connector to Anderson Power Pole adapter that secures to the back of the radio. Be aware that if you leave the DC plug in all the time that you’re rig will think you have external power all the time. This means that your backlit display will not turn off when set to Auto.
I personally acquired a Bioenno LiFePO4 3Ah battery and charger for use with this radio.
Protection
Visit PortableZero products. They have battery cases that include a nice one for the 3Ah Bioenno. It also mates well with the 817/818 series. PortableZero also makes a bracket/bail combo that protects the front of the 817/818 series. The bail feature nicely positions the display and controls for field ops.
Antenna
I typically used this with a wire antenna and tuner.
Otherwise, I have several vertical options including: BuddiSticks, SuperAntenna MP-1 variant, or GRA-7350T. I prefer to use an elevated radial with the vertical antennas. If that isn’t possible, then multiple ground wires.
Coax
My preferred portable coax these days is RG-316. Start with what you’ve got. RG-58 is fine, but bulky and heavy. UG-174 is lossy and fragile. RG-316 is flexible, resilient, low loss and more expensive.
Tuners
When using a random wire antenna, you need to bring a tuner into the mix.
Elecraft T1
I built and use an Elecraft T1 with the 818. Add the control cable for some automated band switching. Not an inexpensive setup, but compact and very functional. Uses an internal 9V battery.
LDG Z817
Another great option is to use the LDG Z817. Fits perfectly on top of the 818. Can be bungee cord attached to the portable zero rails. Connects with a control cable. Uses internal AA batteries.
ZM-4
Awesome Z-match manual tuner kit that is no longer available. Works 160m to 10m. Balanced or unbalanced antennas. Slim profile. Fits right on top of rig. No batteries needed.
Keyer and Paddle
This rig does not have a built in memory keyer. When I want that feature, I find an ultra-pico keyer is a great add on.
For keying the rig, I typically use an N0SA paddle with 3M Dual Lock on the bottom of the paddle. That can in turn be affixed to a weighted base (or jeweler’s bench). My logging clipboard also sports dual lock.
Linear Amplifier
Check out PCBHobby and their HardRock 50 for a kit to build a 160m-6m 50-60w amplifier. There are options for an internal tuner and QSK operation. The 817/818 can be interfaced to the HR50 for band switching. This is a great addition for when you need more than QRP.
Uniden Bearcat 55XLT Information
The radio is a basic 10 channel scanner. Nothing fancy. If you disconnect wall power and it doesn’t have batteries in it, it will lose its memories.
It uses 5 AA batteries. If you put NiCd’s in it, you can flip a switch in the battery compartment and they will charge when you plug it in. (If you use an external charger you don’t have to flip the switch. Leave it on Alkaline.)
The keypad switch “locks” the keypad so you don’t accidentally press a button and change your settings.
Programming a Channel
- Turn on radio.
- It will be in scan mode. Press Manual (orange button) to stop scanning.
- Press Manual to step through channels to get to the one you want. (Or press the channel number and then the Manual button.)
- If “LockOut” is displayed it means this channel isn’t being scanned. Pressing Lockout will toggle the status. You will want to lock out the NWS WX (National Weather Service/Weather) frequency.
- Select channel.
Use the keypad to enter the frequency.
Use E for Enter.
If the radio displays an
Ethis means Error — usually the frequency you typed is outside the capabilities of the scanner. - Once you hit Enter you will immediately start hearing anything on the frequency you entered.
Press the Review button and the scanner will display the frequency programmed for the channel.
A - will be displayed for the decimal point.
Suggested Starting Frequencies
These may be used differently in your area, but they are a good starting point. Radio Shack or the NOAA web page can provide your exact NWS frequency.
| Frequency | Description |
|---|---|
| 162.400 | National Weather Service |
| 162.475 | National Weather Service |
| 162.550 | National Weather Service |
| 146.520 | Ham Radio — 2M National Calling Frequency |
| 147.000 | Common Ham Repeater Output |
| 146.910 | Common Ham Repeater Output |
There is lots of stuff out there — Amateur Radio, Public Service, Utilities, Businesses, etc. Have fun!
Use the word “scanner” and your state name in any search engine and you are bound to turn up lots of local frequency information.
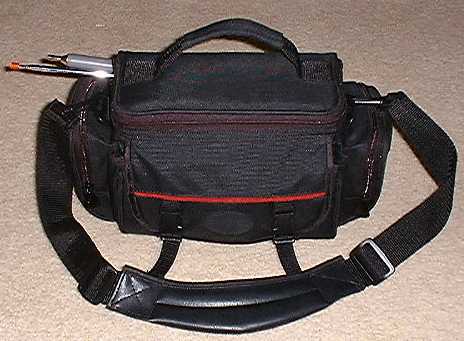
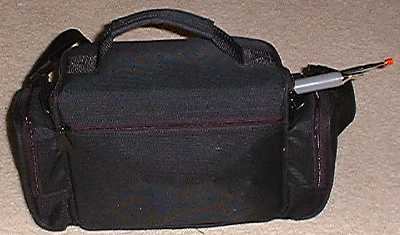
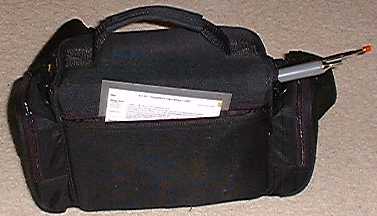
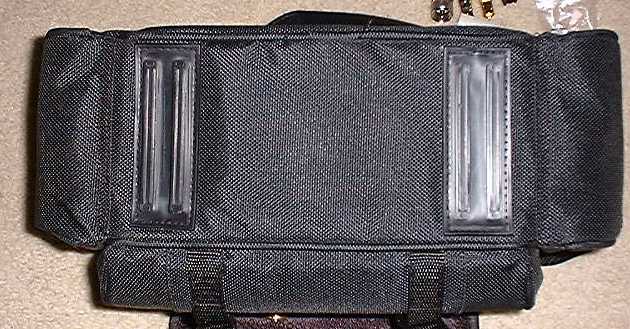
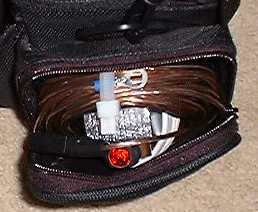
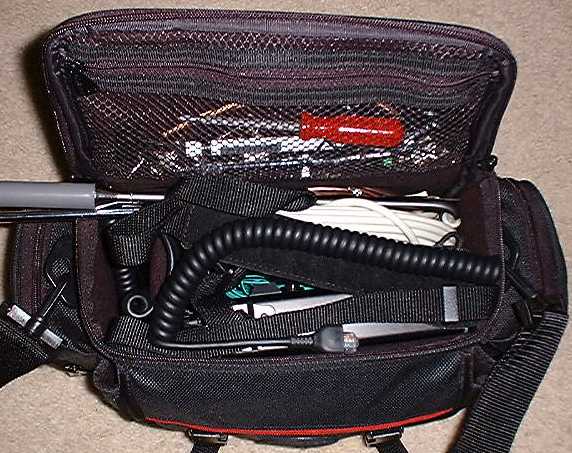
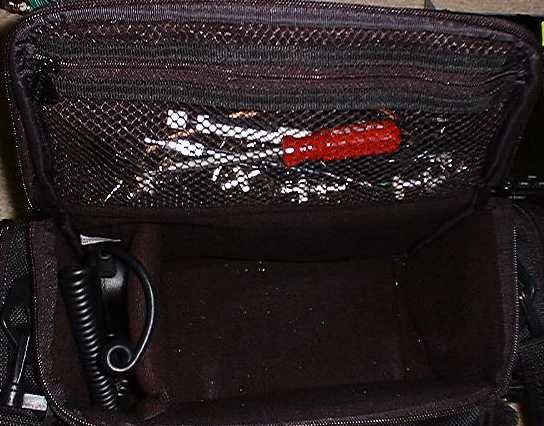
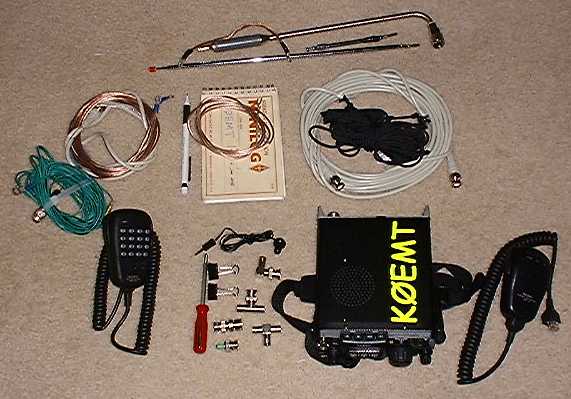
Yaesu FT-817 QRP Portable Station
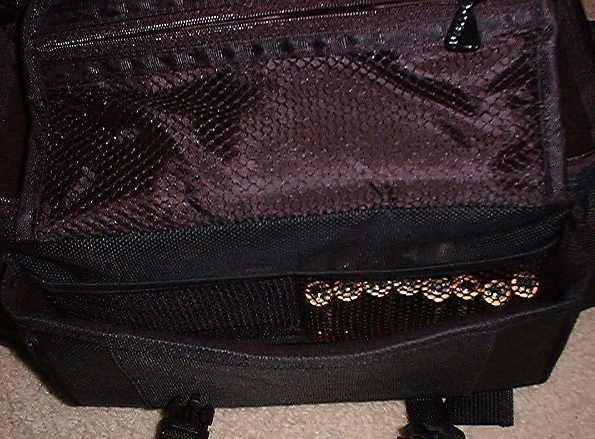
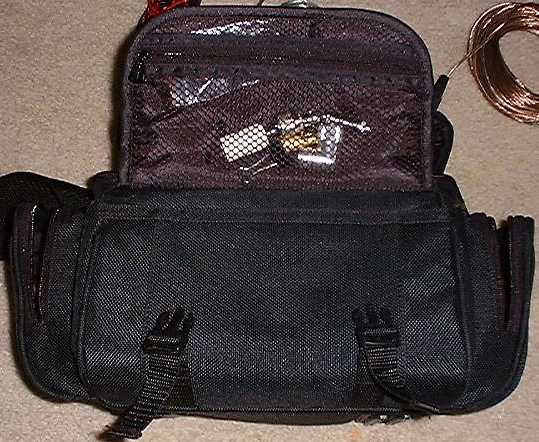
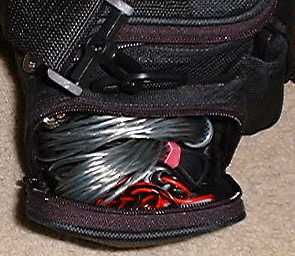
This is an index to pictures of the Ambico bag model V-4420ASST.
I use it for transporting my Yaesu FT-817 along with antennas and other accessories.
This bag is padded, has lots of zippered compartments and has a
life-time warranty. I purchased it for less than $20 at Wal-Mart.
Since taking these pictures I have started using a Super Antennas 3/8"-24TPI mounting bracket. With this bracket on, the bag will NOT zip shut.
If you use the long whip and modified RS 11M back of set antenna, they can protrude from the same opening.
With everything that I stuff into the bag, including two extra sets of AA batteries, the bag weighs in at 10lbs.
June 2002
I have switched to UG-174 coax for quite a bit of weight and bulk savings. However, I do prefer the RG-58 when doing VHF+ weak signal stuff.
Also, Sears, a US department store, was clearing out some 35mm camera bags. I picked up one for $3 that a 7Ah SLA snugly fits into.
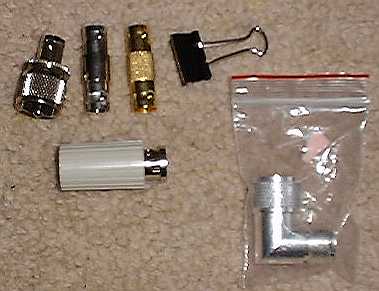
I put a fused pig tail on it with Anderson Power Poles.
In the little front pouch I put the 817 barrel connector and PP pig tail and some spare fuses.
I threw in a couple higher rated fuses in case it needs to be used on another rig.
Pictures of the bag and contents: