5 Watter Phase I
Parts
READ instructions before dumping out all of the parts. Several parts are nearly identical and will be extremely difficult to differentiate if you don’t follow the kit instructions. You can inventory and bin some of the components to make your life easier. 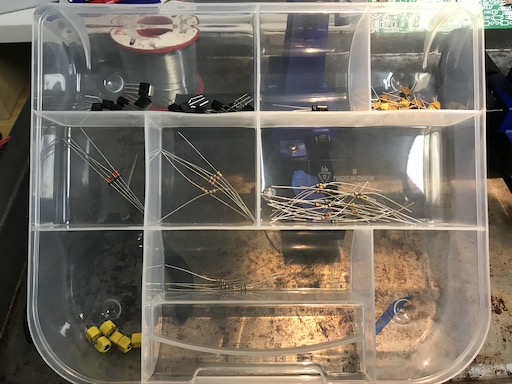
We noticed the substitution of SA602 for NE612. There are no dots on the chips to indicate pin 1. We hope, that the NXP logo is in the position of the dot. The data sheet didn’t really enlighten us on this point. Subsequent testing confirmed that the NXP logo is in the position of the dot.
SMD
Install the SMD parts first. The part density is high and it would be extremely difficult to add them later. If you are not familiar with SMD soldering there are several approaches/techniques. Techniques include: hot plate, oven, hot air tool, drag soldering, and solder paste. SMD devices can be difficult to see and work with. Good light, a magnification setup of some kind, and a good soldering station are necessities. When using a soldering iron, choice of tip will depend on technique used and user preference. You will also likely use a different tip for SMD work than your regular soldering. I was finding that with the board parts density, I was inadvertently soldering neighboring vias when soldering the SMDs. I cut small strips of painters tape to protect neighboring vias. Doing other work, I had heard of using aluminum foil to protect nearby components. I used a Kester flux pen on the board before putting on the SMD. You may choose to use paste/gel, etc. 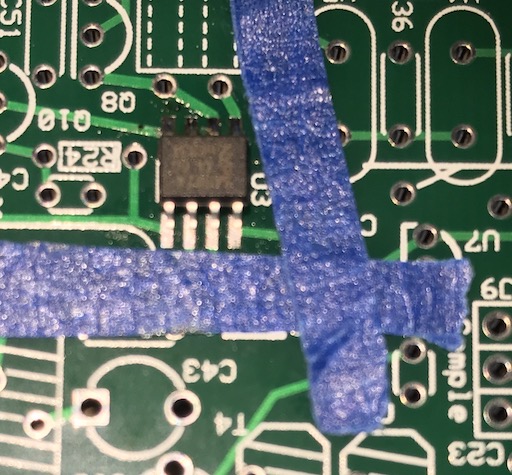
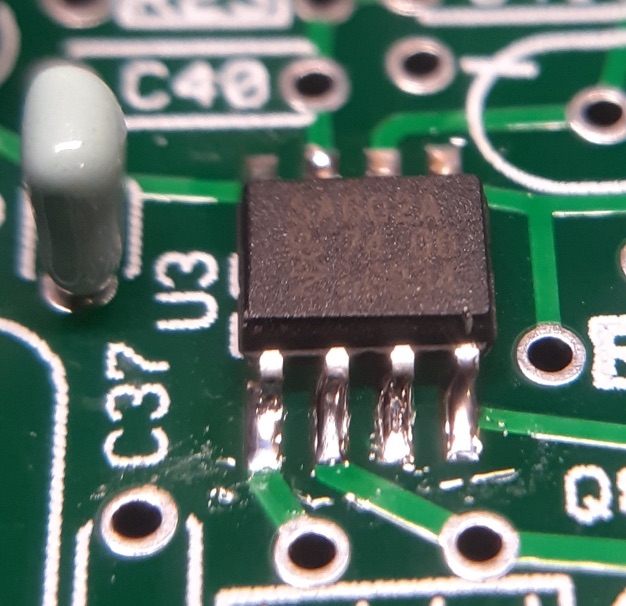
Installed device - W0ODJ
Assembly
There are some minor differences between the K7QO assembly guide and the website instructions. The board and parts have had some minor updates since the guide was created. Keep the original instructions handy during the build too. They include the color codes for the resistors. The assembly guide includes a tip to use some stand offs or bolts/nuts in the corners of the board to keep it above your work surface. Use a board holder as long as you can to make for a more pleasant build process. 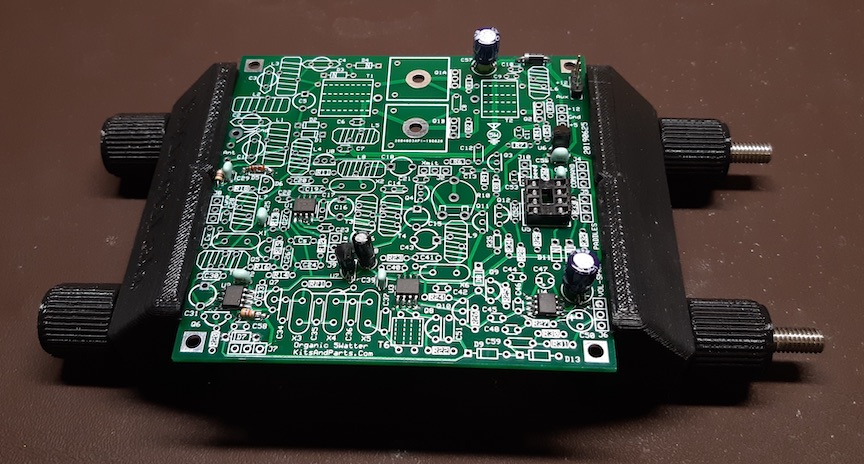
W0ODJ’s completed Phase 1 in board holder
Bench stuff
Having a current limited power supply comes in very handy when testing. I picked up one from Amazon. It is nice to be able to ramp up voltage. Also, the current limiting feature may keep you from setting some smoke free. A good digital multi-meter is good to have. I have an old Fluke 8010a I picked up from eBay for around $40. Having some bread board jumpers (female-male) that you can use with the header blocks is handy come test time.